MCP
1. Introduction
An "external MCP" is an MCP Server provided by another application, service, or local tool, such as a filesystem, browser, database, GitHub, or Notion integration. After connecting one, Agivar acts as an MCP Client and uses its tools, allowing Agivar to call the capabilities provided by other MCPs.
2. Connect an external MCP to Agivar
2.1 Open the MCP page
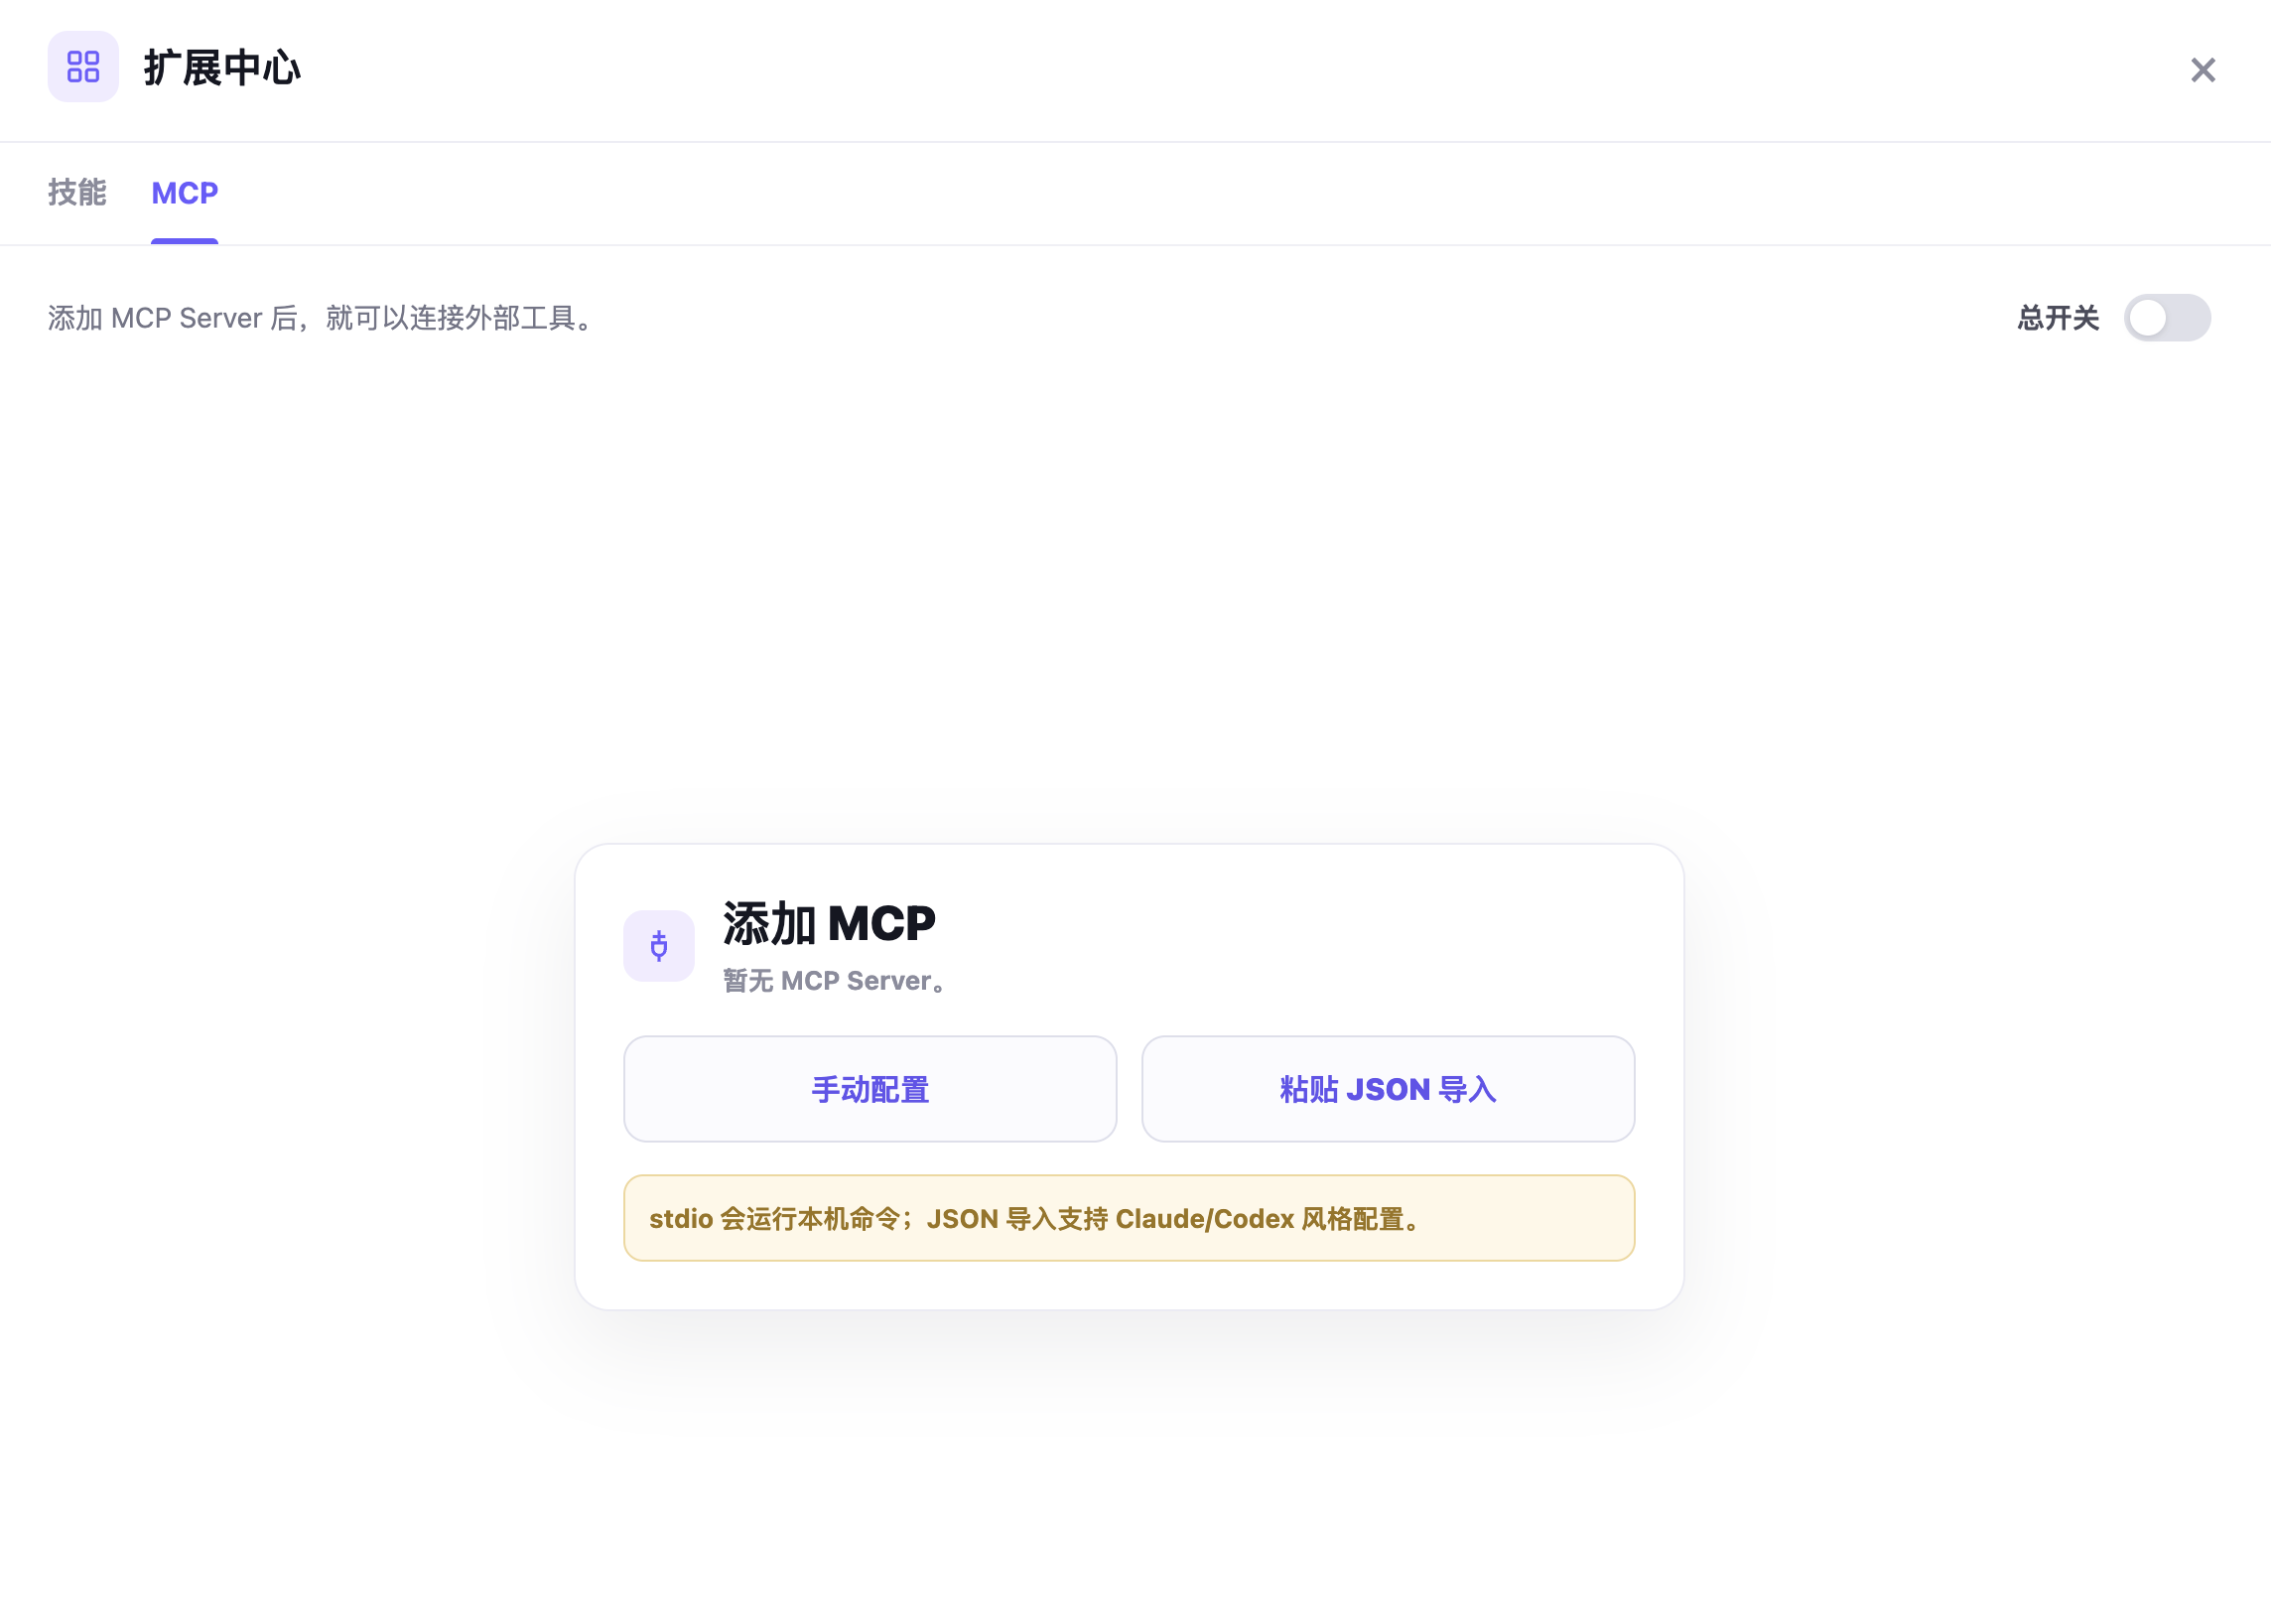
Click Extension Center in the left sidebar on the home page. After entering the Extension Center, click the MCP tab at the top.
If you have not added an MCP yet, the page displays an Add MCP card. You can choose Manual Configuration or Import by Pasting JSON.
2.2 Configure an MCP manually
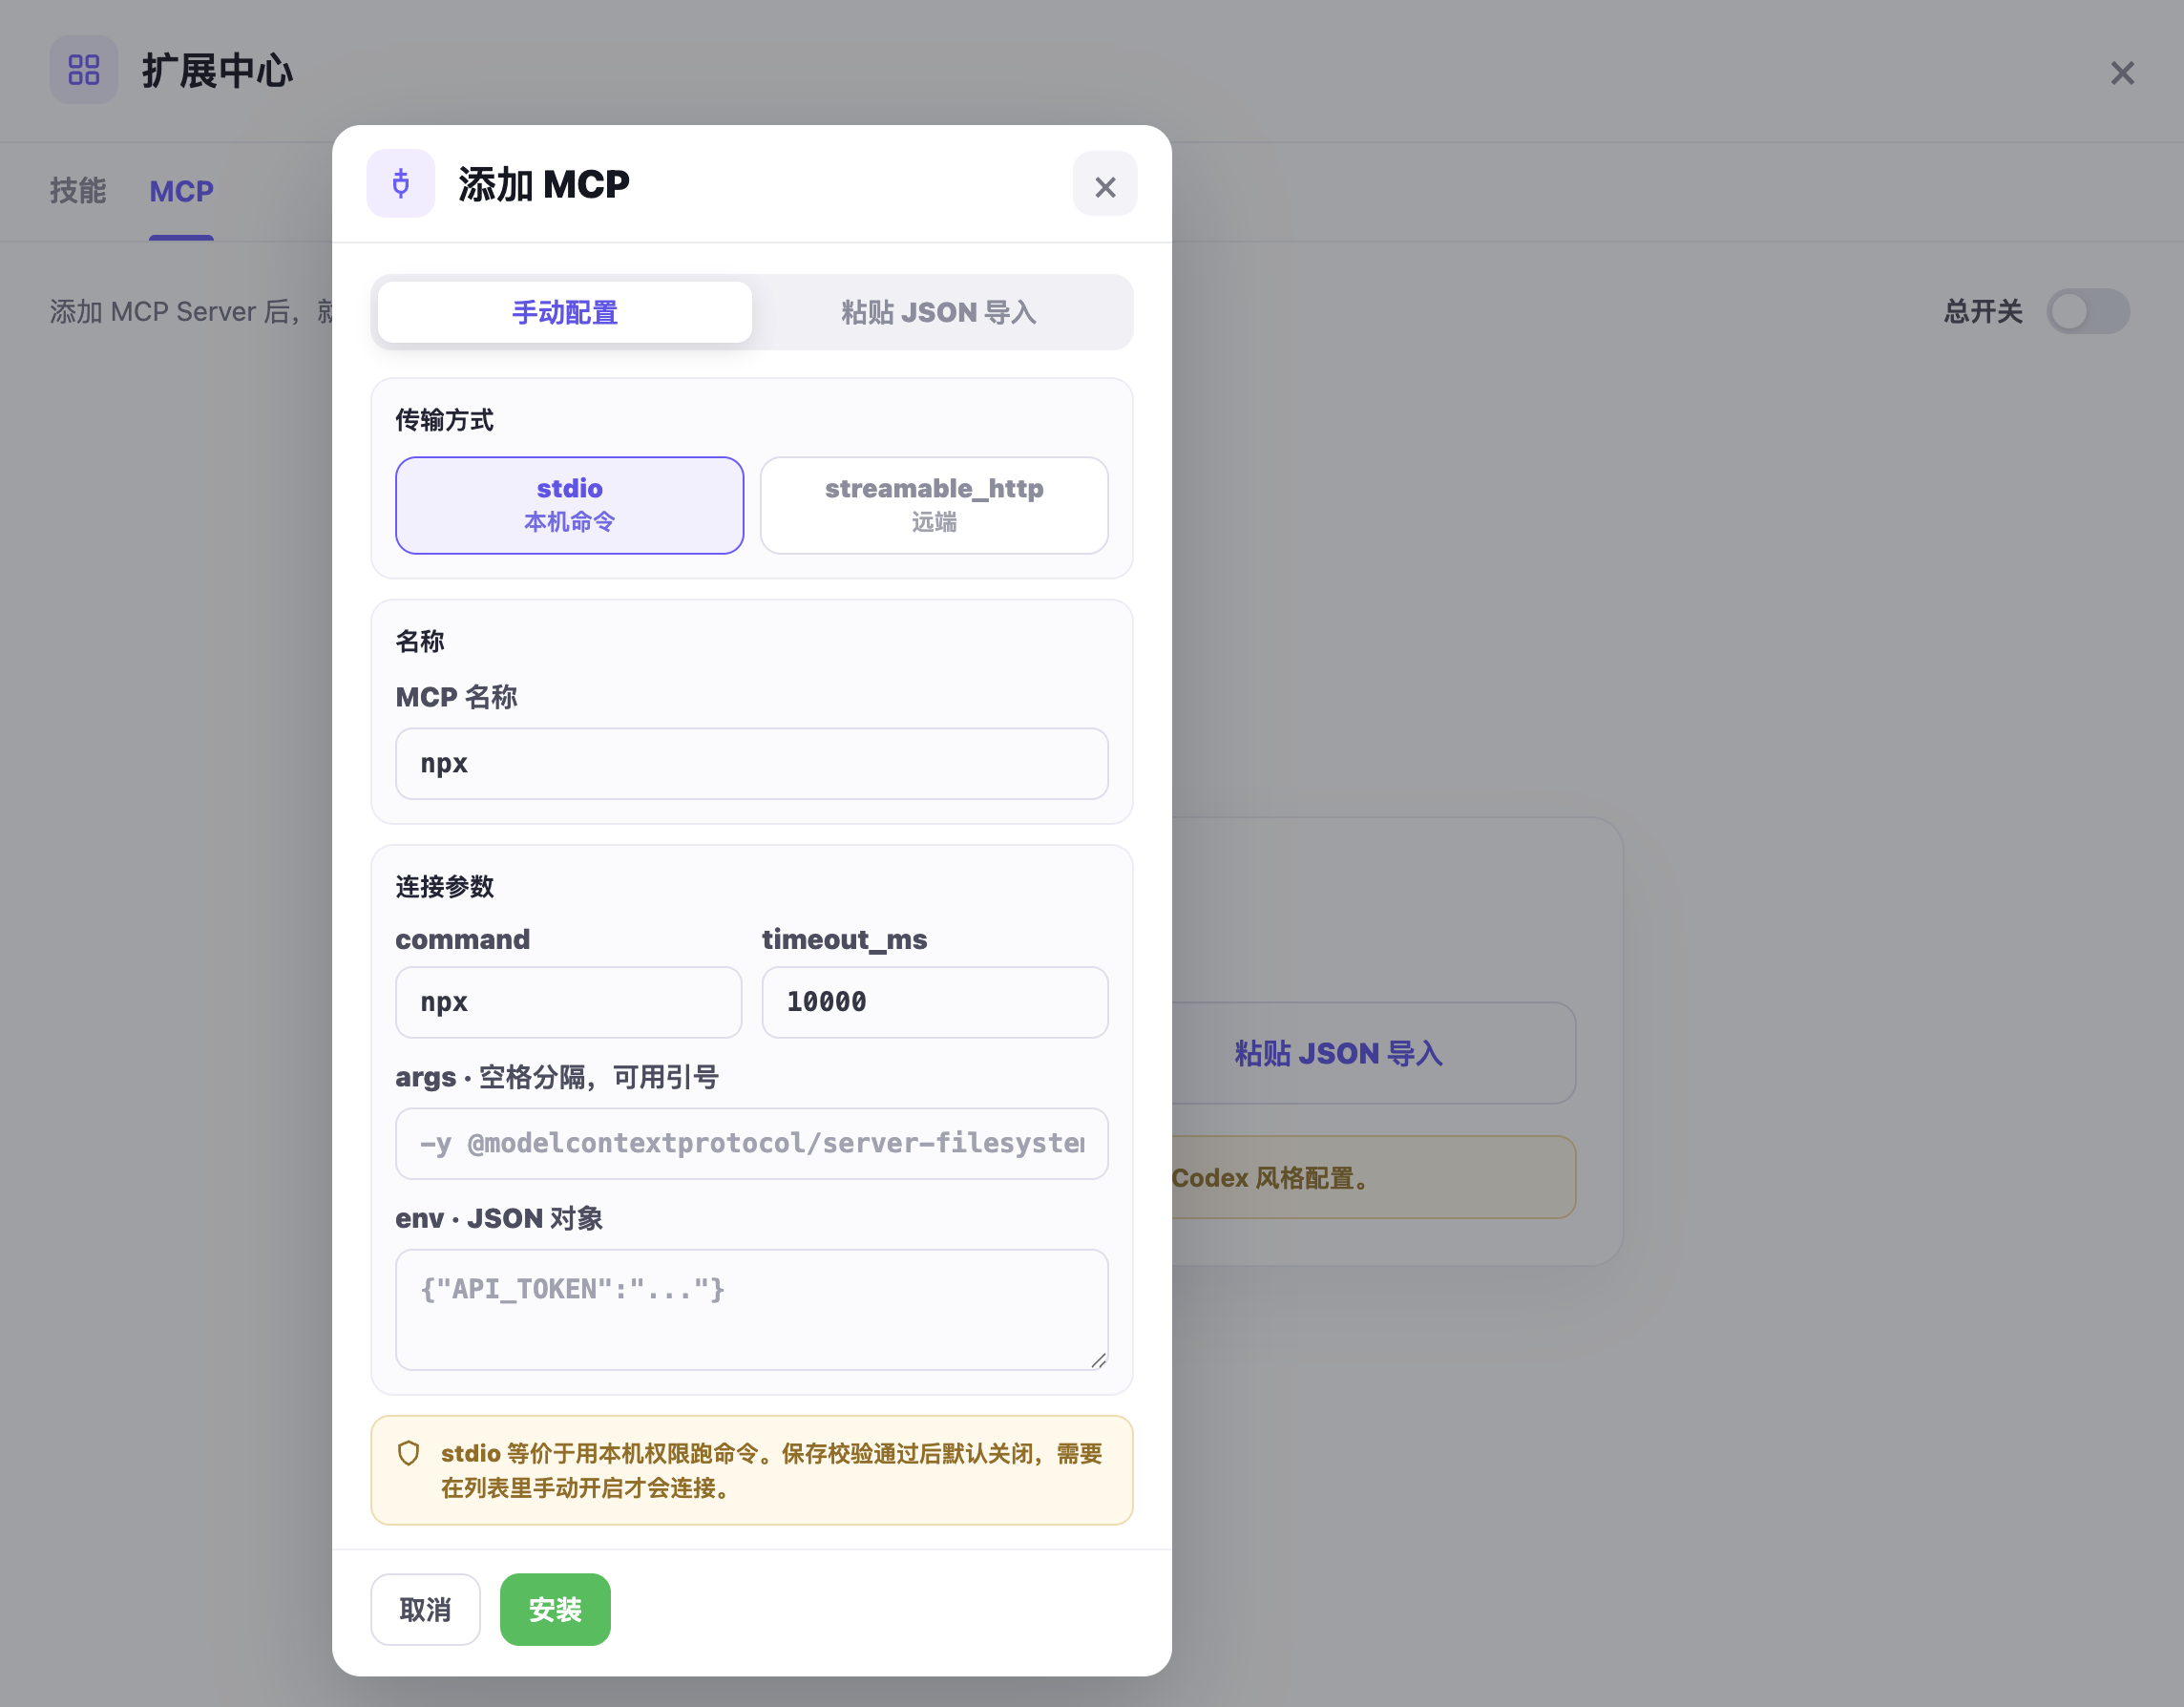
Click Manual Configuration to open the Add MCP page. Manual configuration is suitable when you know the MCP's name, transport type, and connection parameters.
2.2.1 Transport type
The transport type determines how Agivar connects to the MCP.
stdio local command starts the MCP Server through a command on your computer. Use it for an MCP that must run locally, such as one started with npx, node, or python.
streamable_http remote connects to the MCP Server through a URL. Use it for an MCP that is already running on a local port or remote service.
2.2.2 Name
The MCP name identifies the MCP. It appears in the MCP list and in the / selection list in conversations.
Use a short, clear English name or pinyin, for example:
filesystem
github
browser
notion
Do not reuse an MCP name. If several MCPs use the same name, their configurations may conflict, or it may be impossible to tell which MCP was actually called.
2.2.3 Connection parameters
If you choose stdio local command, enter the parameters for the local startup command.
command is the command that starts the MCP Server, for example:
npx
node
python
args contains the arguments passed to the command. Separate multiple arguments with spaces. If an argument contains spaces, enclose it in quotes.
For example, to start the filesystem MCP with npx, enter something like:
-y @modelcontextprotocol/server-filesystem
timeout_ms is the connection timeout in milliseconds. The default can be 10000, meaning a 10-second wait. Increase it if the MCP starts slowly.
env contains environment variables as a JSON object. Use it for API keys, tokens, service addresses, and other sensitive or environment-specific values. For example:
{"API_TOKEN":"your-token"}
If no environment variables are needed, leave the field empty or enter an empty object:
{}
If you choose streamable_http remote, enter the MCP Server address, for example:
http://127.0.0.1:3000/mcp
Local services usually use 127.0.0.1 or localhost; remote services use the appropriate HTTPS address.
After filling in the fields, click Install. Once validation succeeds, the MCP appears in the MCP list. For security, a stdio MCP runs a command on your computer, so it is disabled by default after validation and must be enabled manually in the list.
2.3 Import by pasting JSON
If you already configured an MCP in Claude Desktop, Cursor, Codex, or another client, choose Import by Pasting JSON.
Click Import by Pasting JSON, then paste the existing mcpServers configuration into the input box. Agivar automatically parses it into one or more MCP Servers.
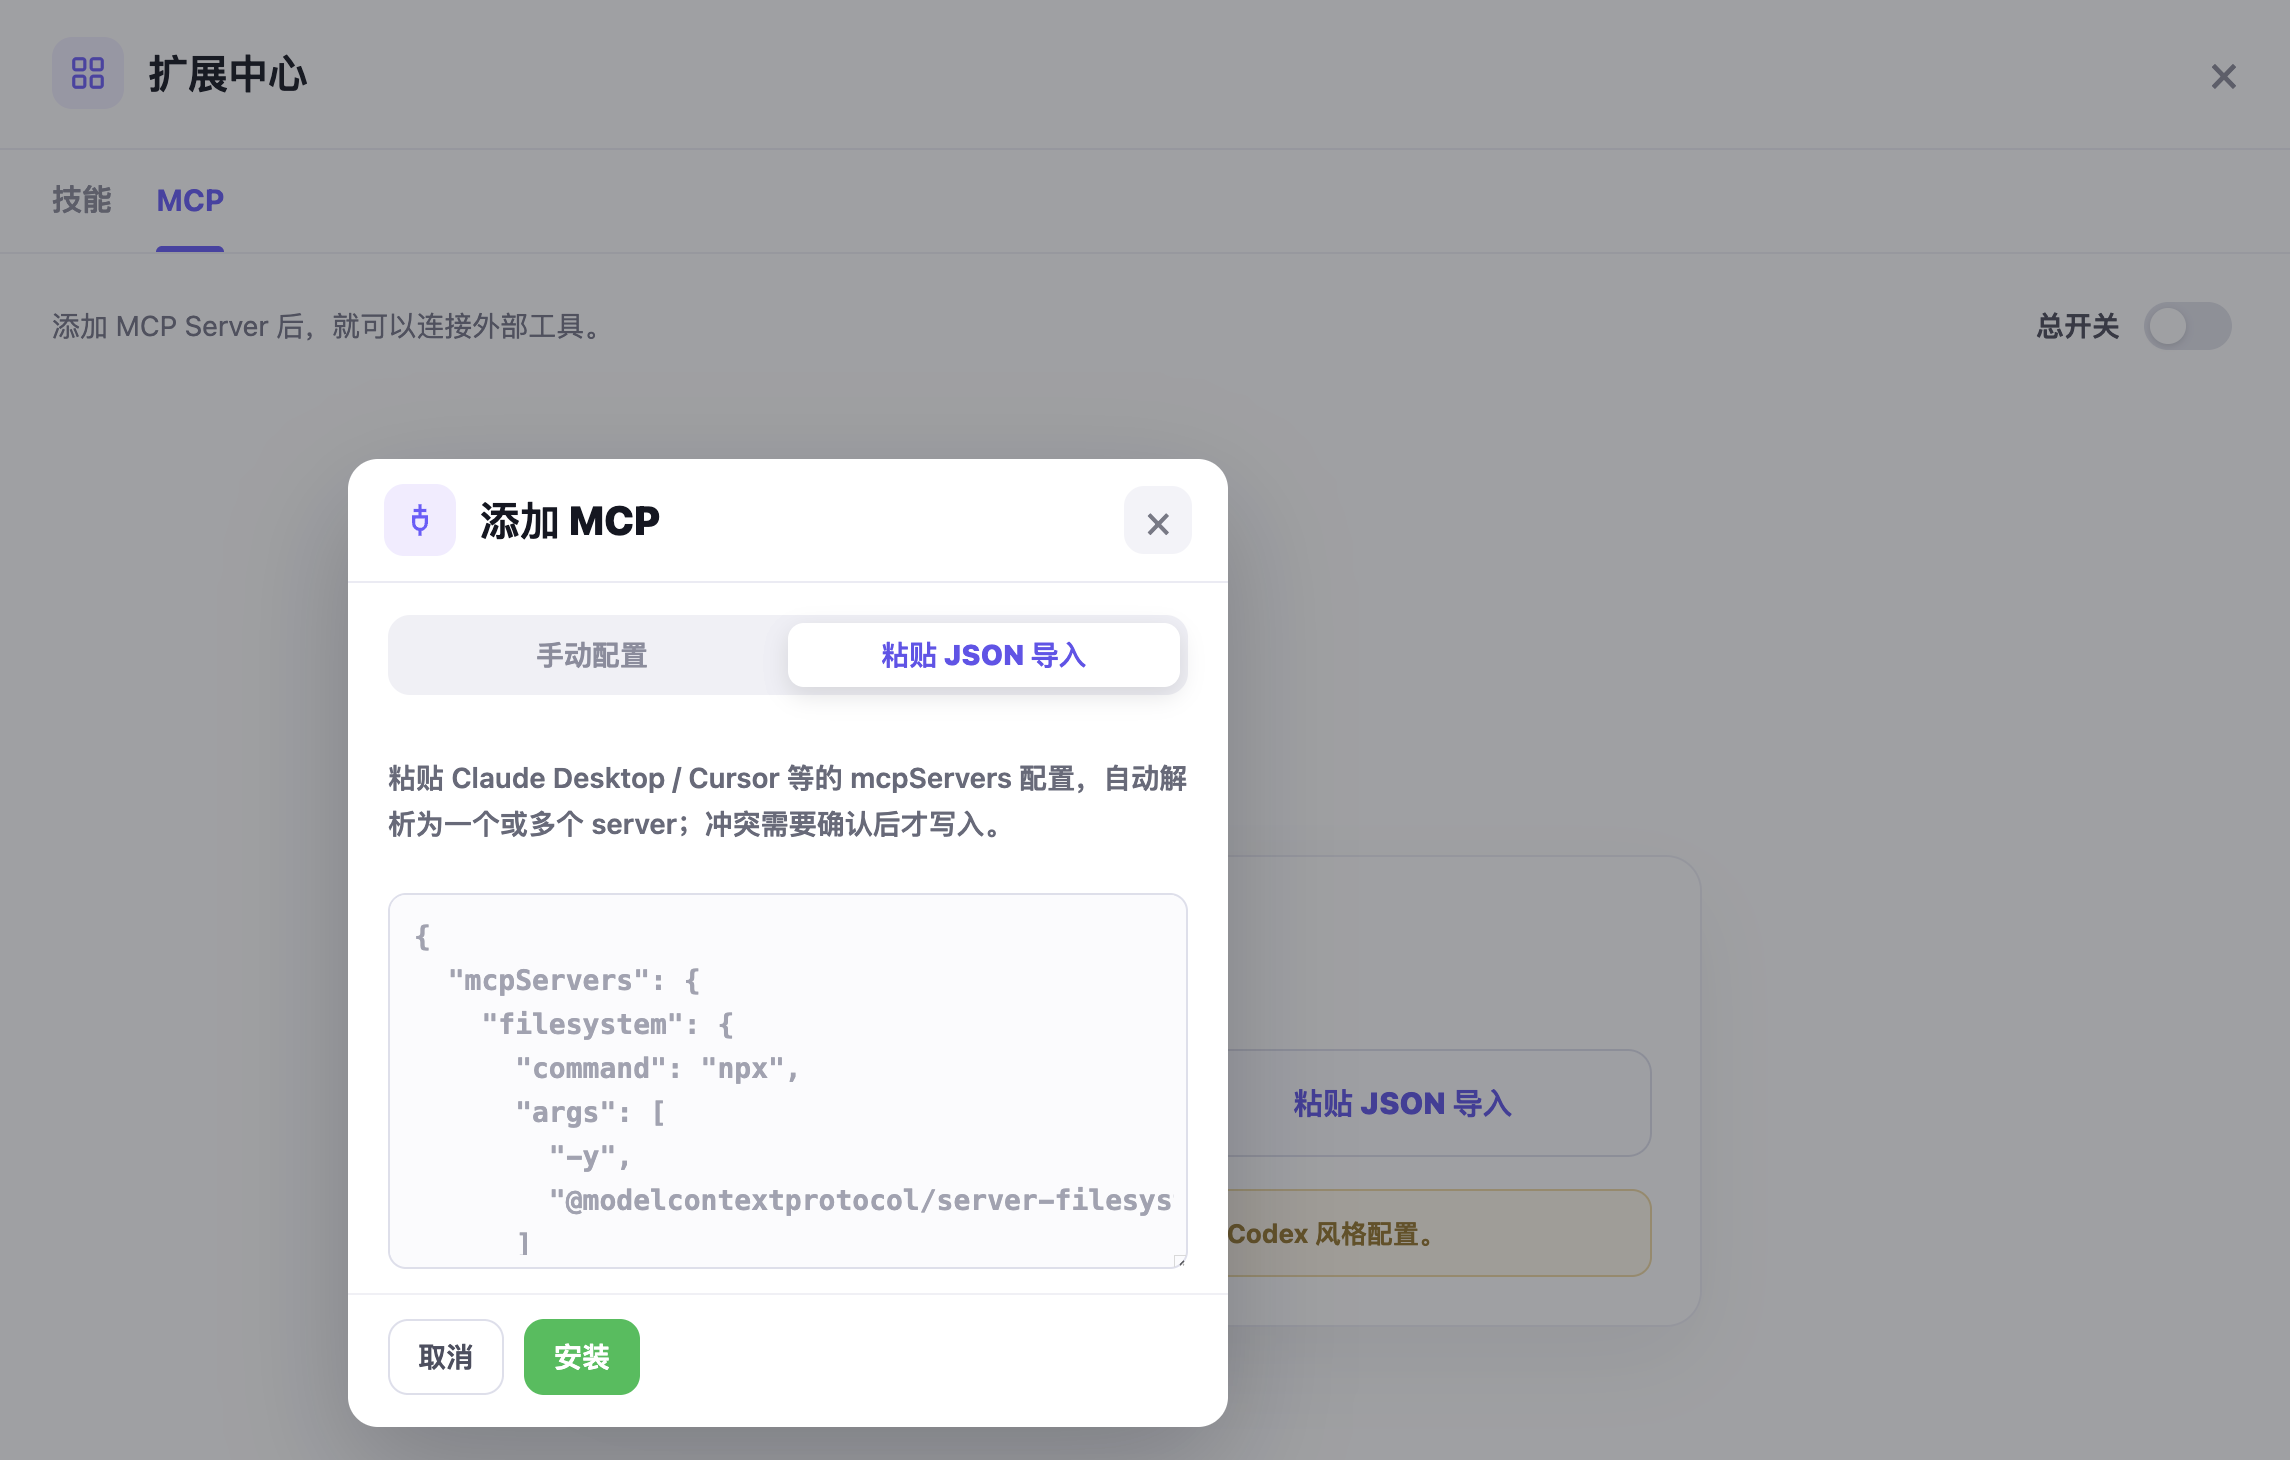
Example:
{
  "mcpServers": {
    "filesystem": {
      "command": "npx",
      "args": [
        "-y",
        "@modelcontextprotocol/server-filesystem"
      ]
    }
  }
}
After confirming that the parsed result is correct, click Install. If the imported configuration contains several MCPs, check for duplicate names. If a name conflicts with an existing MCP, rename it before installation.
JSON import supports Claude- and Codex-style configurations. If the pasted configuration cannot be parsed, check that the JSON is complete, quotation marks and commas are correct, and the mcpServers field is present.
2.4 Manage added MCPs
After an MCP is added, it appears in the MCP list. The list shows the MCP name, transport type, enabled state, and number of tools.
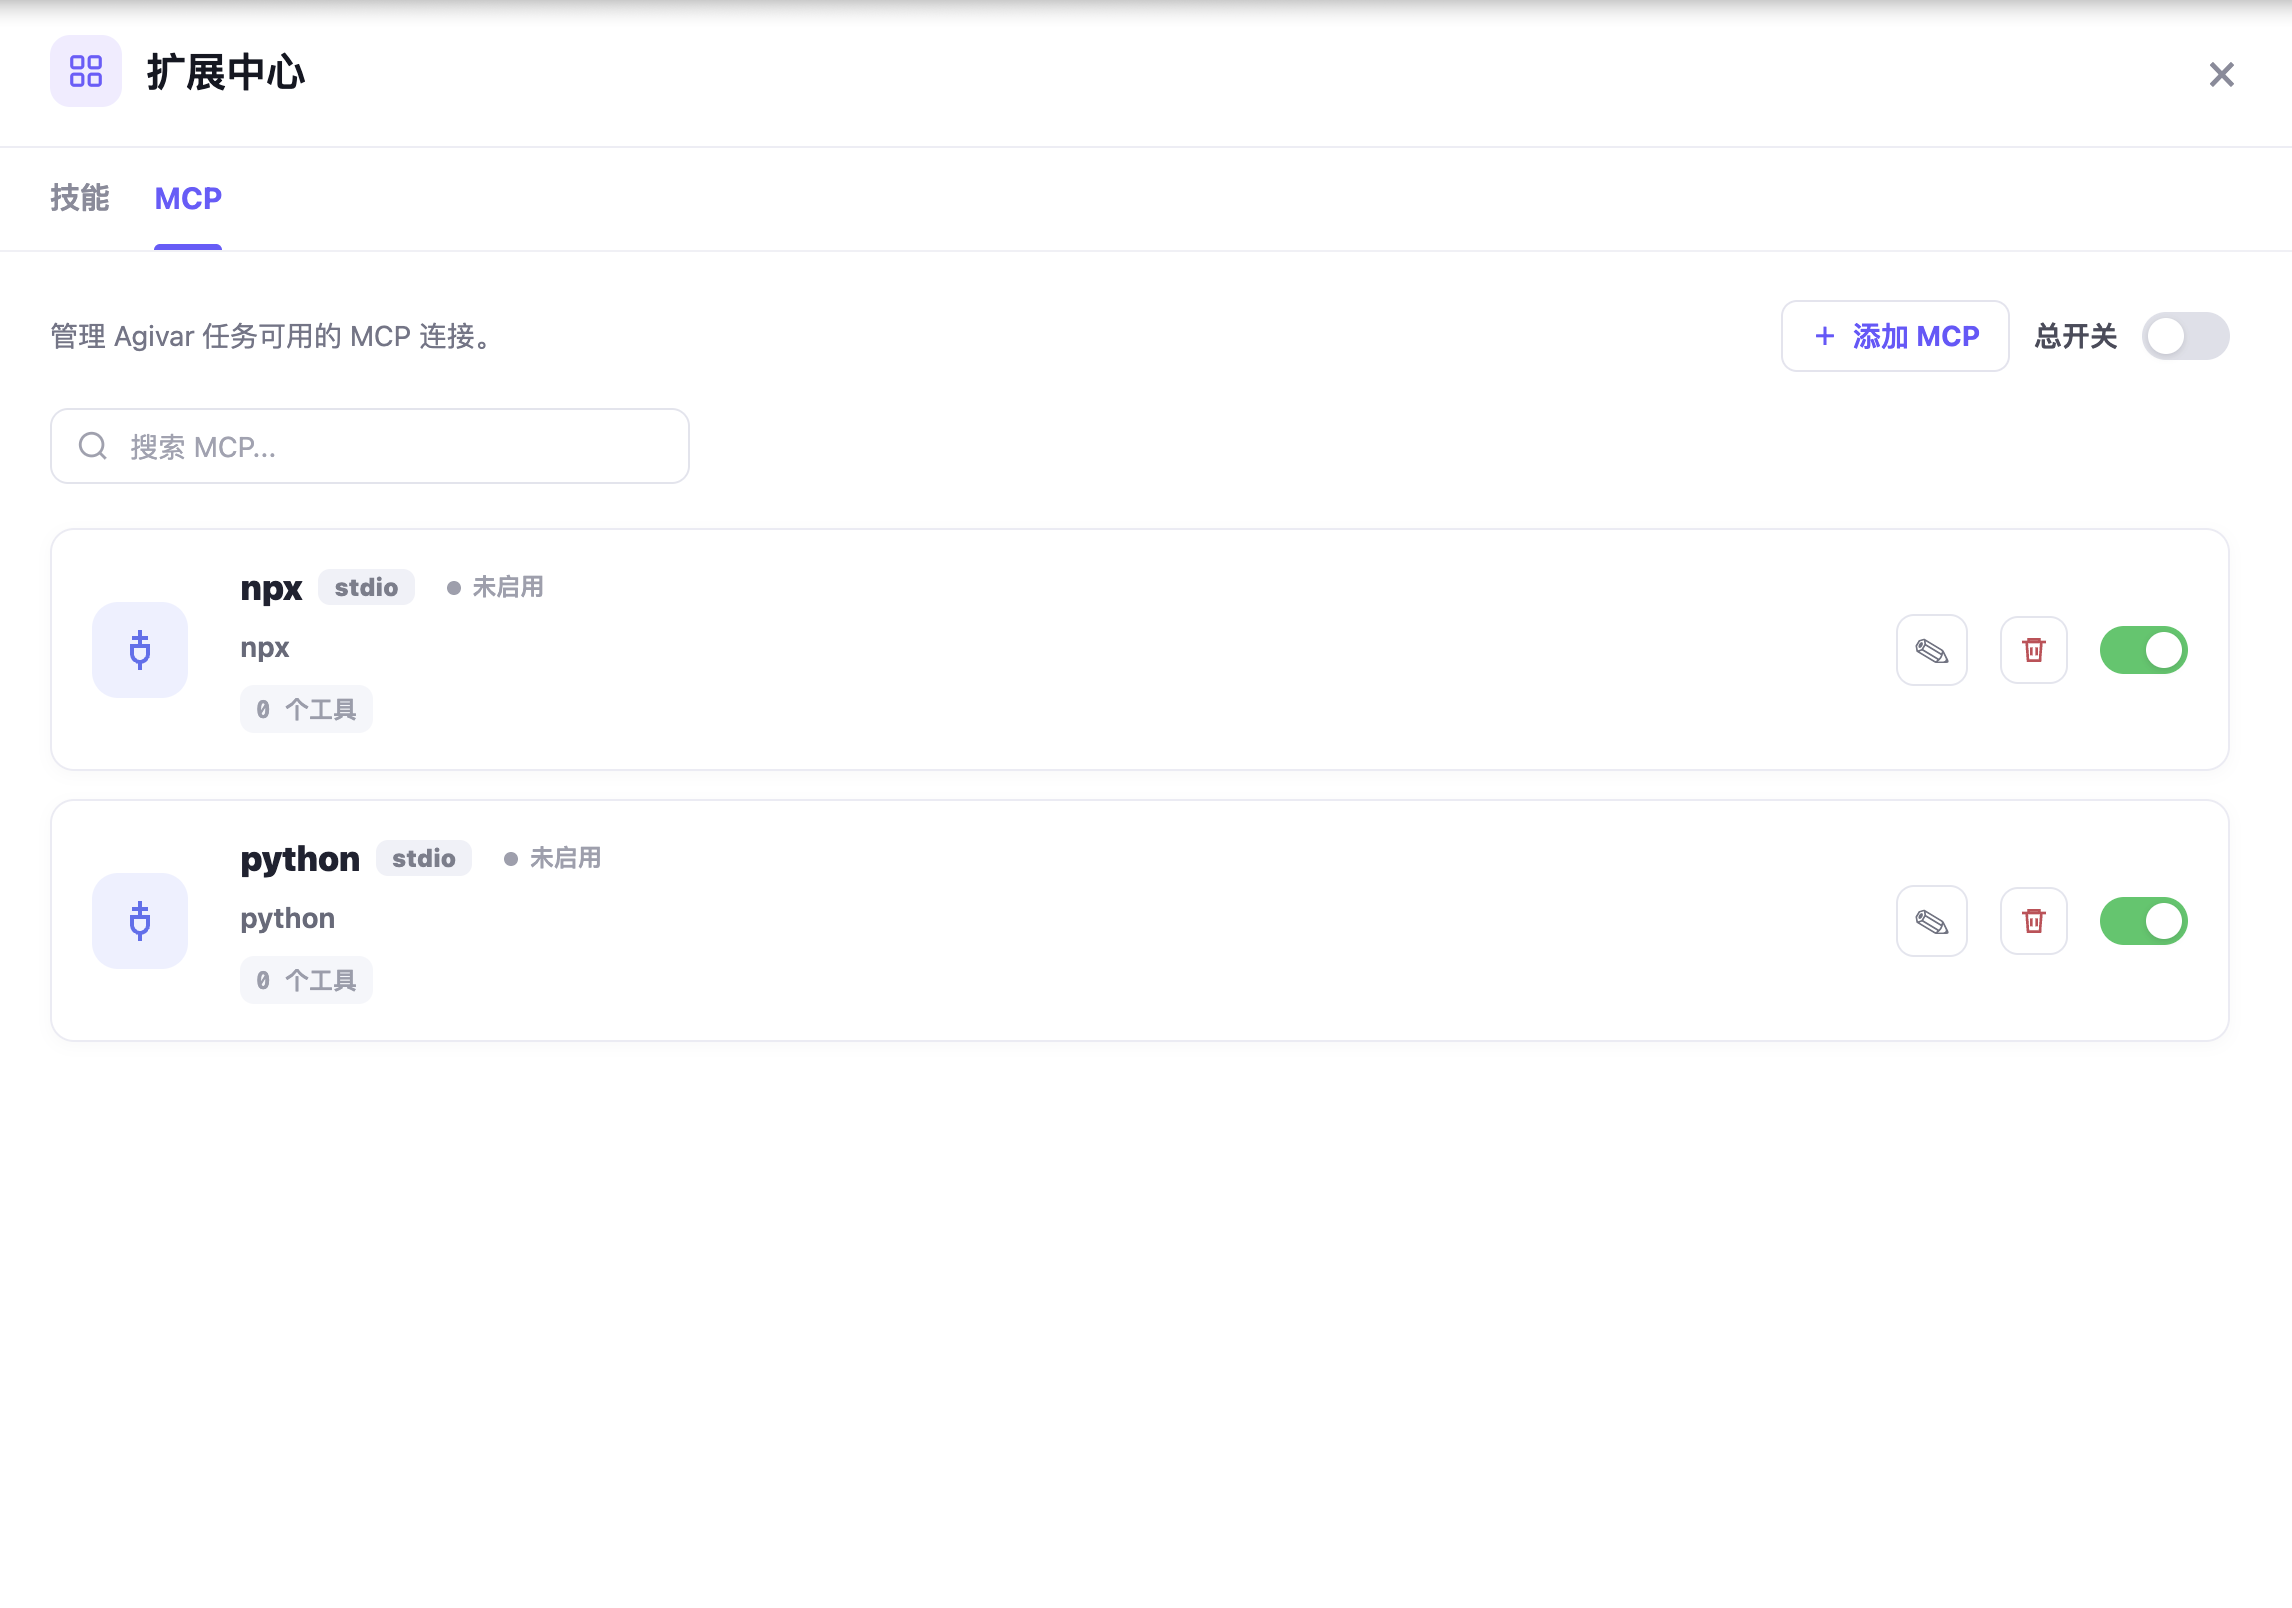
If the status is Disabled, Agivar will not currently use that MCP. Turn on the switch on the right before Agivar can call it during a task.
If the tool count shows 0 tools, the MCP may not be enabled, its connection may have failed, or it may not have returned a tool list successfully. Check the configuration, or enable the MCP and wait for it to connect.
Each MCP card usually has edit, delete, and enable controls on the right. Use Edit to change the configuration, Delete to remove the MCP, and the switch to enable or disable it.
The upper-right corner of the page also contains a master switch. When the master switch is off, all MCPs are suspended, even if their individual switches are on.
3. Use MCP in a conversation
After an MCP is configured and enabled, you can invoke it explicitly by typing / in the conversation input box.
Type / in the input box and Agivar displays the currently available Skills and MCPs. Enabled MCPs appear in this list. Select the MCP you want, then enter the task and send it.
After sending, a label above the conversation shows the MCP currently in use, indicating which MCP the task is using.
3.1 Usage tips
If you want the Agent to use a particular MCP explicitly, type /, select the target MCP, and then enter the task.
If the target MCP does not appear after you type /, check that it has been configured and is enabled.
If the corresponding MCP label does not appear above the conversation after you send the task, that MCP was not used for the task. Select it manually with / and send the task again, or check whether its configuration is correct.